Dreaming of a magical star ceiling in your home? A stunning starlight ceiling can transform any room. This guide will show you how to install beautiful ceiling starry lights step by step.
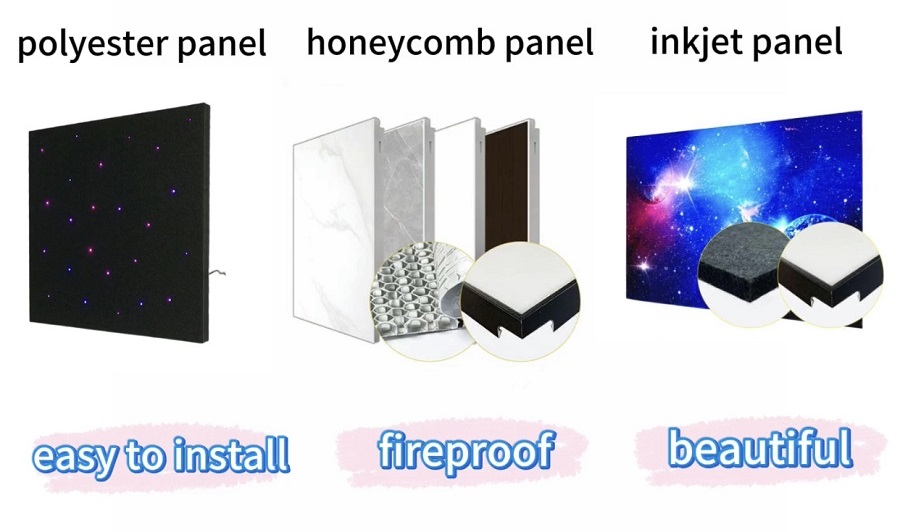
Starry Sky Board offers three excellent panel choices. Each type works well for different situations.

These panels install easily and reduce noise. They work perfectly in bedrooms and home theaters. The sound-absorbing quality creates a peaceful environment.
These panels offer excellent fire resistance. They are safe and durable for any space. The buckle system makes installation simple.
These panels show exquisite visual effects. You can create custom designs for your galaxy ceiling. They turn your ceiling into a work of art.
All panels support personalized patterns and text. You can create unique designs that match your style.
First, measure your ceiling carefully. Note the length and width of the area. Calculate how many panels you need.
Gather all necessary tools. You will need:
Choose your lighting system. Both create beautiful ceiling stars.

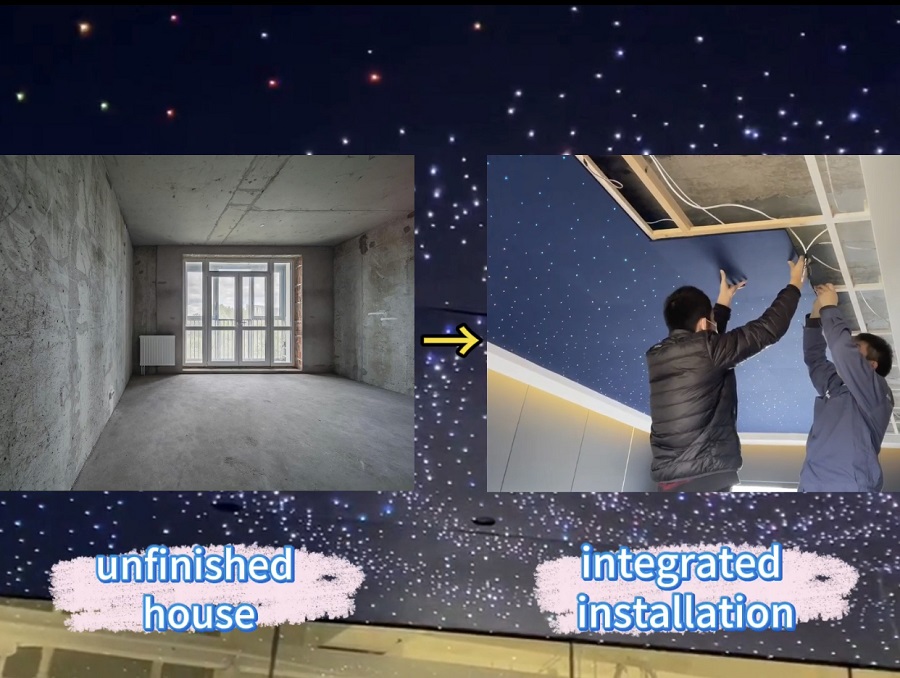
We offer special integrated installation solutions. These make the process efficient and worry-free.
Start by installing mounting tracks. Place them according to your ceiling measurements.
Ensure they are level and secure. Next, run all electrical wiring. Place wires for your star lights for ceiling system.
Keep wires organized and accessible. Now install your chosen panels. Slide them into the mounting tracks. Ensure each panel fits snugly against the next.
You can still add a starry ceiling. Use a drop ceiling method.
First, build a framework below your existing ceiling. Make sure it is strong and level.
Then install panels onto this new framework. This method hides all wires and creates a clean look.
Now install your ceiling lighting stars. For fiber optic ceiling stars, thread fibers through panel holes.
Cut fibers to different lengths. This creates depth in your night sky ceiling. Use scissors to trim fibers neatly.
For LED star ceiling systems, place LED units behind panels. Connect them to power sources and controllers.
Test all lights before finishing installation. Ensure every star on ceiling works properly.
Create your unique ceiling with star lights. Arrange stars in the ceiling in custom patterns.

You can create constellations or random distributions. Make your starlight for ceiling truly personal.
Add special effects like shooting stars. Some systems offer twinkling or color-changing options.
Once everything works, secure all panels properly. Ensure no loose parts remain.
Add final touches like border trim. This gives your star light ceiling a finished look.
Clean the panels gently. Remove any dust or fingerprints.
Enjoy your new optical fiber star ceiling! Turn on the lights and watch the magic happen.
Consider hiring professionals for best results. Experts ensure safe and proper installation.
They handle electrical work correctly. Professionals optimize lighting placement for maximum effect.
They can create complex designs like galaxy ceiling effects. Their experience saves time and avoids mistakes.
Clean your ceiling star lights regularly. Use soft, dry cloths for cleaning.
Ensure all lights continue working properly.
Replace any burnt-out lights promptly. Keep your stars on ceiling shining brightly.
Installing a starry sky ceiling is rewarding. It transforms ordinary rooms into magical spaces.
Choose panels that match your needs. Sound-absorbing for quiet rooms, aluminum for safety, painted for beauty.
Take time during installation. Careful work ensures long-lasting enjoyment.
Soon you will enjoy beautiful ceiling with star lights every day. Your personal night sky ceiling will bring joy and wonder to your home.